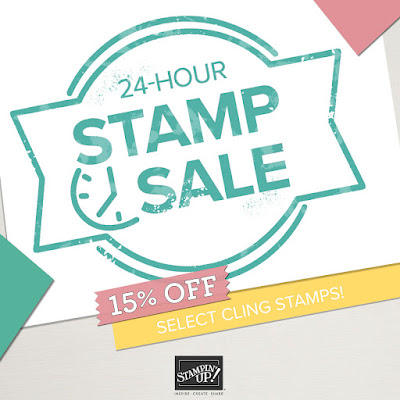
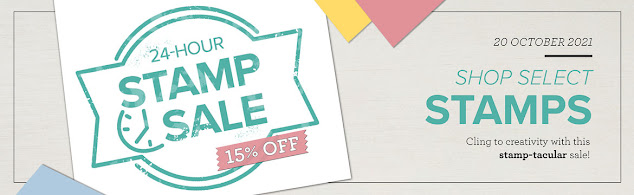
Tuesday, February 9, 2010

Bring on Spring!

So as I was sitting here looking at the snow coming down and swirling around out in the backyard I thought I'd bring you a little spring! I know I need some spring! ENOUGH with the cold and snow already! It's blowing and swirling off of the roof so hard that I can't even see the neighbors house now and then! UGH!

So here is a sweet little card guaranteed to bring some sunshine to your day! You all are getting the first peek at this card. It is a design that I came up with all on my own, which is rare for me AND it's my VERY FIRST ever swap. For those of you who don't know what a sawp is, it's where a bunch of stampers get together and come up with a theme and then everyone makes a certain amount of cards and then you mail them in and the "hostess" divvies them all up and you get different cards back! It's a great idea for demos especially because I may get cards using stamps that I don't have or get cards in a style that I wouldn't necessarily make. That way I can have even more samples to show you! It's been totally fun so far and I'm about to brave the weather to go send mine off before work this afternoon! This swap was Easter themed and I KNEW I HAD to use the new Chocolate Bunny stamp from the Occasions Mini...he is just the CUTEST and looks so yummy! It reminds me of the nosy neighbors I grew up next too, they gave me a choco bunny EVERY year for Easter!

Anyway here is my little bunny!


I made 6 of them and will get 5 different cards back (the hostess gets to keep one of all of them for being the hostess). I really like the colors and simple design here. I did emboss the bunny with choco chip craft ink and clear embossing powder to make him look nice and chocolat-ie. I also used some vanilla hodepodge hardware I had been hoarding, which I tend to do! I hope you like him and I hope the swapers do to!

And one last bit of springy cheer....now is the time to sign up for my "Spring Fever" class. For $10 you will make a variety of spring themed (think Easter and Mother's Day) projects. I promise you will love them and they will be super cute...you may even see this cute little bunny again!

When: March 6th (Saturday) from 1-4
Where: My house!
Please bring: Scissors and adhesive, oh and a friend!
Cost: $10 (Get half off with a $50 order and free with $100)
RSVP to me by Feb 27th! mightymouse5003@hotmail.com or 217-620-3994
Space is limited so sign up today!

And don't forget SAB lasts until March 31 so all orders over $50 will get SAB benefits!


Stay warm, drive safe, and happy stamping!

Thursday, January 28, 2010

Very Vintage!

Hi stampers! So vintage...I'll be the first to admit it's not really my style...well it wasn't...until now! Vintage is very "in" right now and I'm loving it. SU's Vintage Vogue set makes it so easy to create vintage inspired projects. Something super easy to add vintage appeal to a project is my hands down all time favorite technique...SPONGING (did I spell that right?)! It adds depth and dimension to your project as well as that perfect aged look. AND it's suuuupppper easy. Just take a sponge (I use SU' sponges and cute each one into 4 wedges, can you say value?) and dab it onto your ink pad then sponge your paper. You can do just the edges or rub or dab it over the whole image. Using the same ink color as paper will add a subtle touch or using a darker color (usually a brown tone) will add a deeper more antiqued look.

Check out this card which was inspired by our demo magazine we get. It was actually a scrapbook layout but I used it as inspiration for a card (can't wiat to use the layout for my old black and white photos from my grandma).


So, I sponged the Bermuda bay card base around the edges in the same color ink. I sponged the edges of the soft suede butterflies in matching ink as well and brushed the ink over the whole thing few times. I created my own designer paper in the center of the oval by stamping and stamping off various colors and stamps then I spnged soft suede over the whole thing and edged it in old olive. Sponged the oval frame as well AND swiped soft suede ink over the embossed background image. WOW, that was a LOT of sponging. BUT it was fast and super easy!

Here is another vintage card made with Vintage Vogue. It was inspired by a fellow stamper on SCS!


This time I've incorporated sponging onto designer series paper. It also uses a sentiment from Messages from Mom, which shows how versatile our stamp sets are. They can easily be mixed and matched! The one detail I will point out on this card is that I took the inkpad directly to the paper and "swiped it" on around the edges a few times, you can see the "smears". This is also a quick and easy way to add that vintage charm That's it for today! Hope you enjoyed today's projects and tips. Try one today! Time to think about working on my very first swaps! So excited!

Happy stamping!

Tuesday, January 26, 2010

Twice in one day?

Yes! I'm posting twice in one day. Why you ask? Well because I went over to one of my favorite stampers blogs and I found a challenge there and was totally inspired! You can check out Ilina's blog here

For this challenge I used the SAB set Good Neighbors. Her pillow inspired the colors and the layout! It uses Bashful blue, mambo melon, elegant eggplant and old olive. The roofs are popped on dimensionals as well as the image panel. I used the sanded background stamps for the "grass" to give it some depth. Hope you all like it and hope Ilina likes it! Go and play along!!!! It's fun!


Feeling Blue...

(I apologize in advance if the pics don't work, blogger seems to be wonky today and I have no idea what's up with it, so I'm going to cross my fingers and post away)

So with the crummy weather lately (anyone else been feeling like we are living in a Harry Potter movie with the Dementors????) my cards today have a theme....blue:-) Thank goodness the sun is out today even if there is some more white stuff on the ground! I have two cards to share today. One is a Valentine that doesn't use pink! The other could easily be reworked to become a Valentine since it uses hearts!

The loads of love card was fun! This is one of my most loved sets, it's the first one I ever got and can be used for SO MANY occasions. There is also a couple of accessory sets you can purchase to make it even MORE versatile! I used watercolor paper to color the truck, watercolor paper really does make your image better when using the aquapainter! It was easy peasy to stamp the hearts too, the trick is to stamp the truck and then I just put a sticky note right up to the line at the bed of the truck and then stamped the hearts on and peeled off the sticky! The little pennant was just cut out free hand, too easy! Inspiration for this card came from a stamper on Splitcoast...thank you! So here it is:


Stampin' Supplies: Ink - Rich Razzleberry, Bashful blue, Staz-on, old olive
Paper - watercolor, bashful blue, old olive, rich razzleberry
Stamps - Loads of Love, sanded (background stamp)
Accessories - Mat pack/paper peircer, brad, linen thread dimensionals

The next card is more turquoise than blue but still in the same color family I guess. It uses Hello Again, the cutest little set that you can get FREE during Sale-A-Bration with a $50.00 order...but more on that later. The card is UBER simple. The heart with hello was stamped once in the top corner then stamped again in the bottom WITHOUT re-inking so that it's a bit lighter. This is called "stamping off". The ribbon is simply folded in half and secured with a glue dot then adhered to the cardstock. It's a great way to use ribbon without adding bulk to your card (ensuring mail-ability) and without having to tie (the bane of my existence). Again, this card was inspired by someone on Splitcoast. Those women are so talented!


Stampin' Supplies: Bermeuda Bay, soft suede, whisper white, crushed curry
Ink: same
Stamps: Hello Again
Accessories: Ribbon, glue dots

Now, on to a little blurb about SAB. From now until March 31st every time you spend $50.00 before shipping and tax you can get a FREE stamp set! And for EVERY 50! There's NO LIMIT! It's a great time to order or have a workshop!

I'm also looking for stampers to fill a club. In a club we meet once a month or maybe once every other and you learn a new technique and get to stamp with friends. You have a minimum order each meeting and it's a great way to budget and build your stash. The best part is everyone in the club gets a turn at being the "hostess" which means you get the hostess benefits when it's your month! Let me know if you're interested. The more members, the cheaper it gets for you each month! And I'm going to teach you some really fabulous techniques! Try to stay warm and Happy Stamping!

Monday, December 14, 2009

A "CLEAR" Choice

First of all, sorry for not posting in a long time. There just aren’t enough hours in the day are there? I especially need more hours at Christmas time and during basketball season. This job really cuts into my stamping time! HA! Anyway I know I have been hinting to some exciting stuff for a while and now here it is…drum roll please….

SU! Is going to be offering an un-mounted option for stamps starting with the SAB sets and sets available in the Occasions Mini which starts on January 5th. They will still be RED rubber but will have a cling mount and clear acrylic blocks will be available for purchase as well. Un-mounted stamps are a great space saver, you can better see where you are stamping through the clear block and un-mounted sets will have a lower price point when compared to wood mount. For all you wood mount traditionalists (like myself) have no fear, the mounted sets are here to stay; you just have the option of mounted or un-mounted now.


Secondly, the punch style will be changing. They are going to a more slim line punch that can be locked closed and can be stacked on top of one another or lined up on a shelf or desk to save space. They also still fit on the IKEA rails if you store them that way. All new punches will be in this design.


Finally, more exciting news; this year for SAB you can not only pick FREE sets (for every $50.00 spent) from the SAB brochure but you can now pick from a variety of stamp sets from the big Idea Book and Catalog as well. This is very exciting if you have earned all of the SAB offerings or don’t care for many or any! Also available in the SAB brochure for the first time is a punch and DSP pack. Both are super cute! Call or email me today to get your copy of the SAB brochure and the Occasion’s Mini!


So now on to the really fun stuff, the projects! I have been busy in my stamp room! And this time not just cards, I’ve been working on a number of home décor/gift items as well as cards. I’m going to be posting a lot of projects today! These are great projects and if you’re making them for gifts you’ll want to make one for yourself as well!


The first project is the easiest. All I did was take a Décor Elements snowflake and apply it to a glass vase. I filled the vase with glass pebbles and added a candle for a simple but elegant candle holder. A word of advice, make sure to clean glass before decorating it, I used plain old Windex. It helps the image adhere better when you get rid of reside and finger prints. The DE’s go on really easy and come with instructions.


My second project was inspired by the magazine us demos receive each month. It’s Santa In A Jar. I just LOVE this guy. I simply stamped my Santa image; water colored, and cut him out and then stamped my trees and cut them out as well. I taped toothpicks to the bottom of each cut out and stuck them down in the jar that I filled with some glitzy filler. Tied an old olive ribbon on the jar and voila! Instant Christmas cheer!


Finally, one more project with DE’s. This time I used the DE décor blocks. They are smooth MDF blocks that come in packages of 4. They are sized 3 inches square. I covered the blocks with old olive textured cardstock and then embellished away. The letters are from a décor element that is available in the Holiday mini catalog. I applied them directly to the paper. I then tied them all together with some more old olive ribbon. I think they are just adorable and can’t wait to make more items with them!


Hope you enjoyed today’s projects! If you see anything you are interested in or would like more information on how to make them, as I said, please contact me!


Stay tuned, I’ll try to get my card samples using the new clear stamps in the next day or two. Be patient and check back often! Contact me by phone or email for more information on any project, to request catalogs, or to book a party or workshop…don’t forget Valentine’s Day is right around the corner!

Wednesday, October 28, 2009

I love this card Just Beclause

So I've moved on from most things fall and onto Christmas, crafting wise anyway. I was inspired to make this card by Heather from Stamping with Heather (check her out, she has way cute stuff). I am having a hard time with this little guy even though I LOVE him, he is just too cute! When I saw Heather's card I was in love. I love the vintage look and colors, they fit Santa very well. I love her coloring but I must say I'm watercolored challenged so I did my best, hoping to get better one day. I also kept my layout rather simple. The star belongs to the Patterned Pines hostess set from the mini catalog. Colors are creamy caramel (it's so yummy), soft suede and bravo burgundy (I'm really starting to like this color). I stamped santa in stazon on watercolor paper. Hope you like him!


Now go check out Heather's blog:
http://stampwithheather.typepad.com/stamp_with_heather/

Thursday, October 22, 2009

Fall Birthday

Hi stampers! Just wanted to share a card with you that I made last night. Today is my mom's birthday so I made a card for her last night. I copied the idea from the October issue of Stampin' Success. It's a little out of the box for me as far as layout...most of my stuff is clean and this is a bit different with circles, but it really cuaght my eye in the magazine. I loved the colors and I think it's great for fall and I think my mom will like the colors too. The card base is textured card stock which I love, it adds that little extra something. The leaf images are stamped and the cut out, which really didn't take too long. Soooo...here is the card:


Stampin' Supplies:
Falling leaves stamp set
Rich razzleberry textured CS, more mustard, old olive, whisper white and chocolate chip CS
Classic inks of the same colors
Circle punches, scallop border punch
chocolate chip taffeta ribbon, stampin' dimensionals

Thanks for looking and happy birthday mom!